
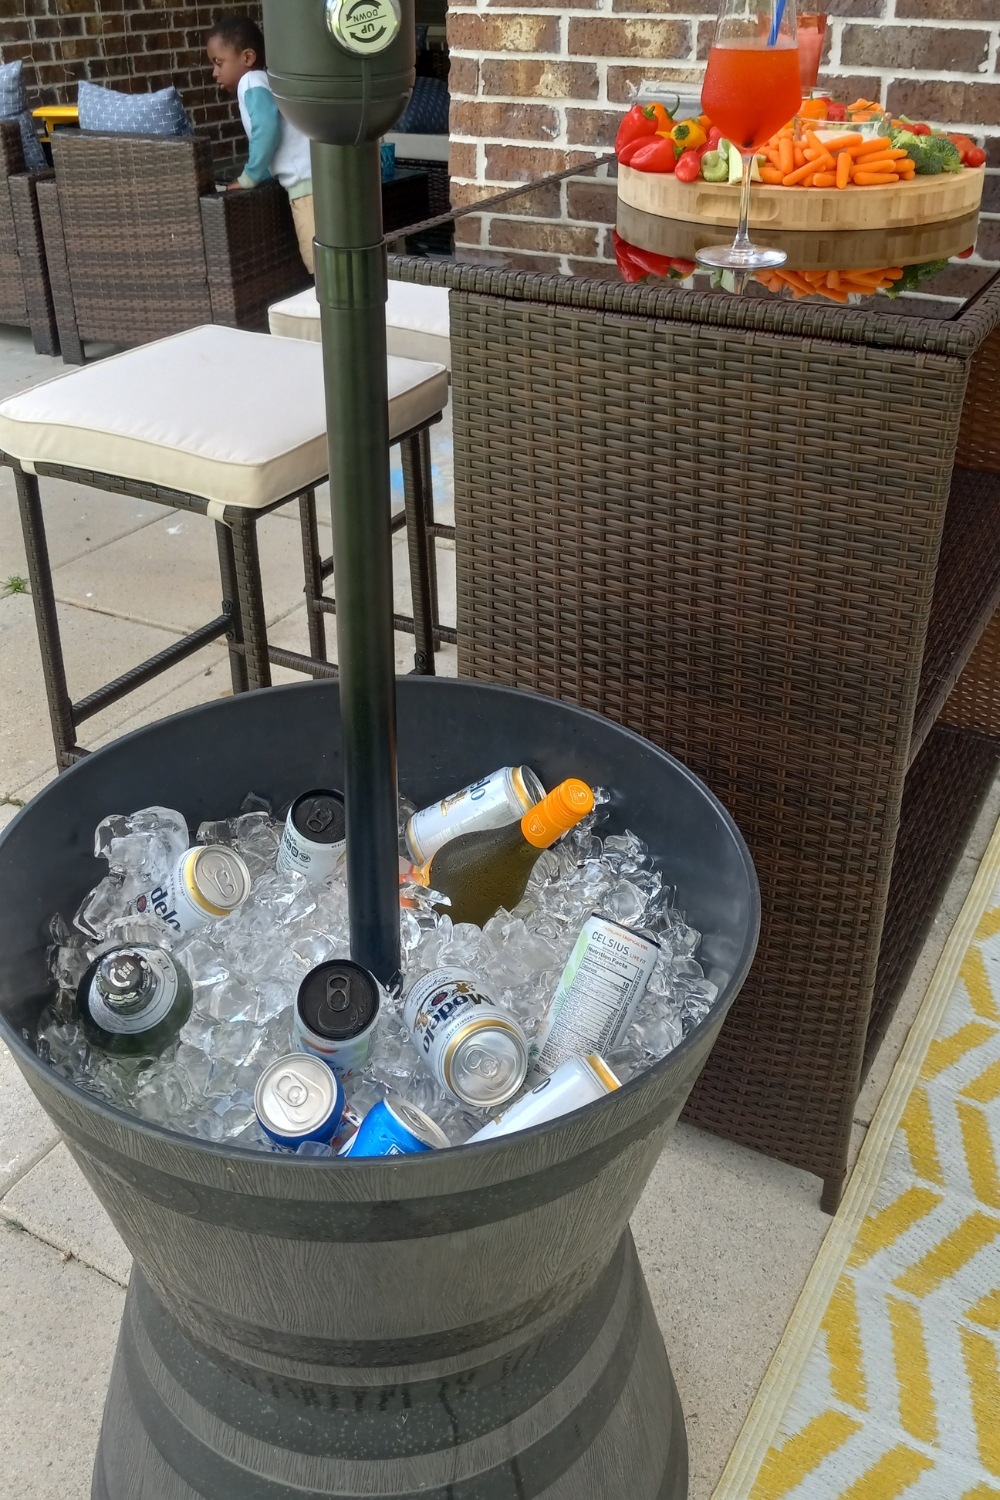
Easy DIY Umbrella Stand Cooler
FTC Disclosure – This is a sponsored post by Sunnydaze Decor. This post also contains affiliate links and I may be compensated if you make a purchase after clicking on my links. #SunnydazeDecorJuly #sponsored
Jackpot! This DIY Umbrella Stand Cooler is the easiest solution to hide your ugly umbrella stand.
Better yet, it doubles as an awesome patio cooler for all your outdoor entertaining needs!

Small Space Problem Solving
Don’t let a small backyard space hold you back from your outdoor entertaining dreams.
For the longest time, I thought my dream of having a beautiful patio complete with lounge seating, a separate dining area, and a grill zone were dashed.
I’m working with a small space and sharing it with all of my kid’s outdoor toys and activities.
Between the inflatable pools and the splash pads and the hundred other toys they love to spread around the backyard, there was no space.
I put a lot of work into the patio area this year. I’m beyond happy with the lounge area I’ve been able to create, but I still needed some sort of dining space.
I love eating outside, but I hate having to bend over the low coffee table to do it.
I knew I could find a budget-friendly, small-space solution with a little creativity.
My Patio Wishlist
Frankly, there’s nothing you can’t do in your small space when you think outside of the box.
The key to making a small backyard space feel larger is to have a few key multi-tasking pieces.
This way you’ll have all the functionality you want without feeling crowded.
In addition to my designated conversation area, I want an area to sit and eat at an appropriate height, and also a place to set trays and plates while grilling. Sort of like a mini outdoor kitchen.
The Sunnydaze 9′ Solar LED Patio Umbrella with Tilt and Crank
First and foremost, I knew that there would be no alfresco dining without shade. At least not here in the 100-degree Texas heat.
Solving the problem of how I’m going to shade my area was of utmost importance.
My covered patio area is at maximum capacity and there was no more shaded area available.
Luckily, a perfectly timed opportunity to partner with one of my favorite brands allowed me to get my hands on a huge solar-lighted umbrella.
The Sunnydaze 9′ Solar LED Patio Umbrella with Tilt and Crank was the perfect solution to my shade problem.
Moreover, it’s the second Sunnydaze Decor product I’ve used this year on my patio and I couldn’t be more thrilled with the way it looks and performs.
The color of the umbrella is a wonderful, neutral tan which matches my cushion covers. It’s made of a nice-weight canvas-type material. It has a tilt, crank, on/off switch for the lights, and creates a large shaded area.

Of course, the coolest feature of all is the built-in solar lighting. The ribs of the umbrella are dotted with small LED lights.
At night they create a beautiful ambiance.

Out of the box, the only thing you really have to do to assemble the Sunnydaze umbrella is connect the solar panel to the top of the umbrella.

There’s a small cord that connects the rechargeable battery and solar panel to the lights in the umbrella. A simple twist will secure the panel to the top of the umbrella and that’s it!
To put the umbrella in charging mode flip the on/off switch on the umbrella to the off position. When you want to turn the light on, simply switch the switch to the on position and the umbrella will light up.
It couldn’t be easier to use and is quite stable in strong winds.
Between their planter bench and this umbrella, they’ve made summer at home with the kids so much more enjoyable. Everyone has a space to sit, everyone has shade, and everything coordinates beautifully together.
This is the best my outdoor space has looked since we moved into this home. So a big thanks to SunnyDaze for gifting this to me.
The Patio Bar Table
My next decision was what I was going to use for seating. Because I didn’t have a lot of space to work with I thought I’d get a small bistro set.
But the more I looked at them, the more I realized that I wanted a slightly larger surface to put dishes on. I wanted a dining area that could double as a prep station for the grill.
So, instead of a bistro set, I found a bar table set. It comes with two stools, and an appropriate overhang so you can tuck your legs underneath. Two people can dine together, and there are shelves on the back side of the unit to store beverages, glasses, utensils, etc.
It also gave me a long counter-height surface that I could use to rest trays on while grilling.
If you have a small space like me and you still want dining and an outdoor kitchen feel, check out patio bar tables on Amazon.
I bought mine for $100 plus another $35 or so in shipping. Here’s a link to the exact one I purchased. It matches my conversation set perfectly and is made from a sturdy metal frame wrapped in a brown faux rattan.
The color of the cushion covers match as well. It creates a nice cohesive look in the backyard, which I love.


DIY Umbrella Stand Cooler Instructions
You don’t need much in the way of materials or tools for this project. Just measure, cut a few holes and you’re in business.

What You’ll Need
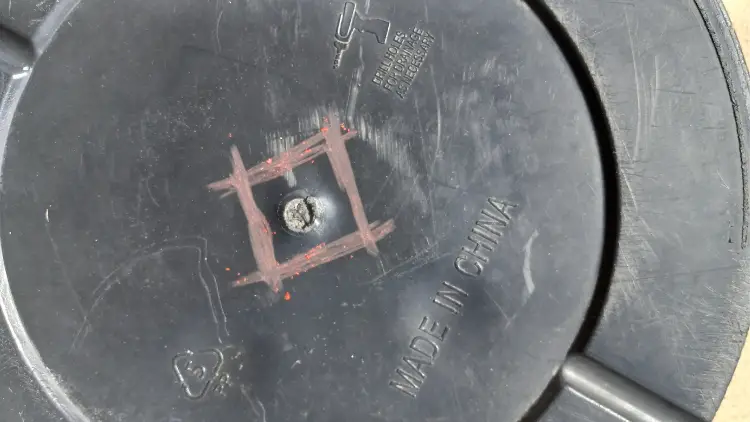
- Umbrella Base
- 2 Plastic Whiskey Barrel Planters (22″ at Home Depot or 25″ at Tractor Supply)
- Measuring Tape
- Drill
- Box Cutter or Knife
NOTE: BEFORE YOU BEGIN
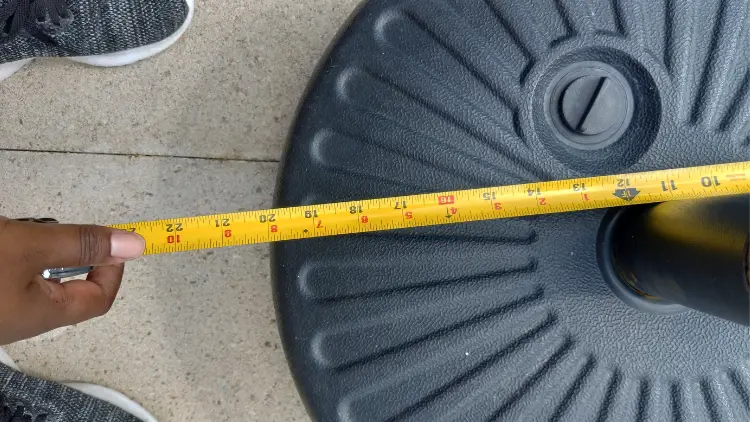
Make sure the diameter of the whiskey barrel is slightly larger than the diameter of your umbrella base. My base measured 20 inches across and my whiskey barrels measured 22 inches across at the rim.

Instructions
Step 1: Measure your umbrella pole.
First, measure your umbrella pole to figure out how large the hole in the bottom of your planter needs to be.
If a portion of your umbrella base is going to stick through the bottom planter, measure that width as well.

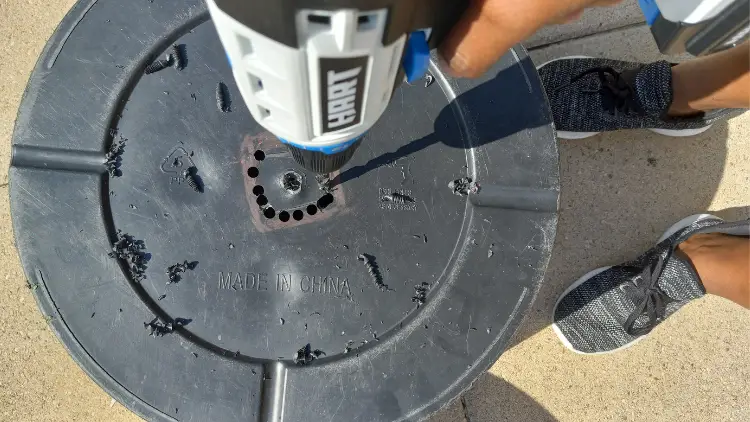
Step 2: Divide your pole diameter into two and mark out your perimeter.
Dividing your pole diameter in two will tell you how far from the center of the planter barrel you need to measure around on all sides to create the right size hole.
Start by marking out a square, then drawing a rough circle just inside of the square. This doesn’t have to be exact, you can always widen your hole if needed. Better for it to be too small than too loose.
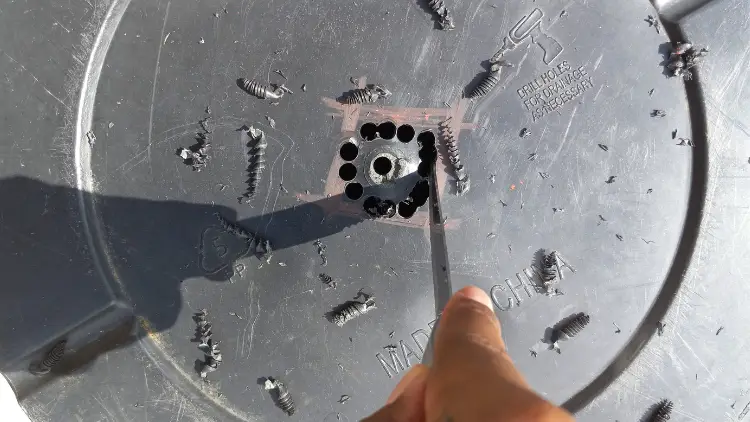
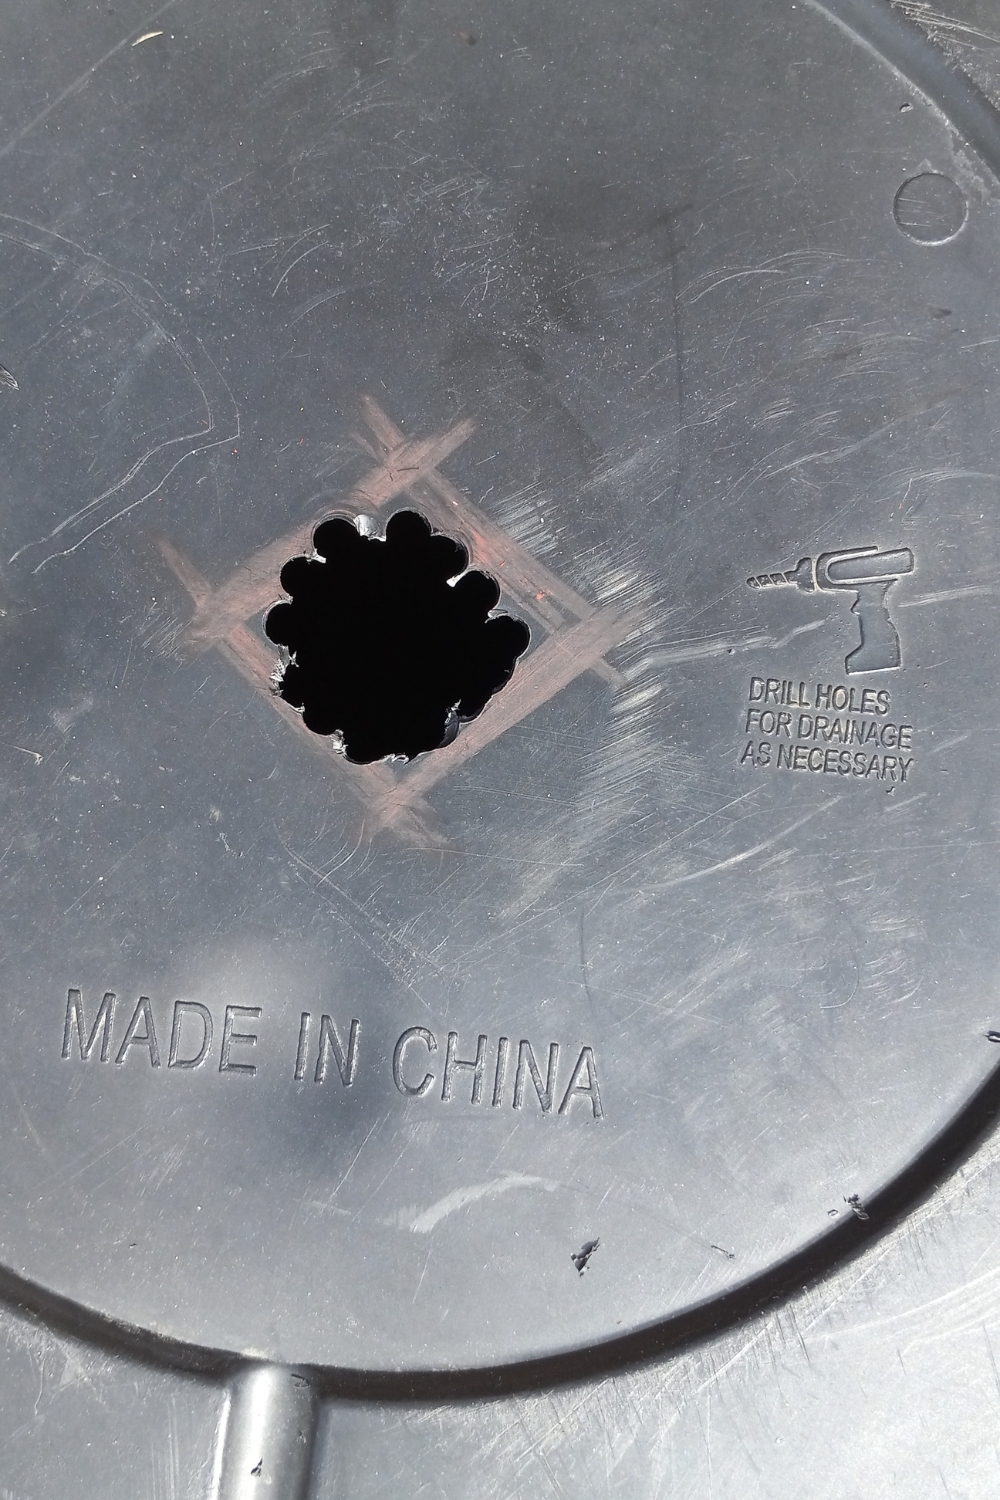
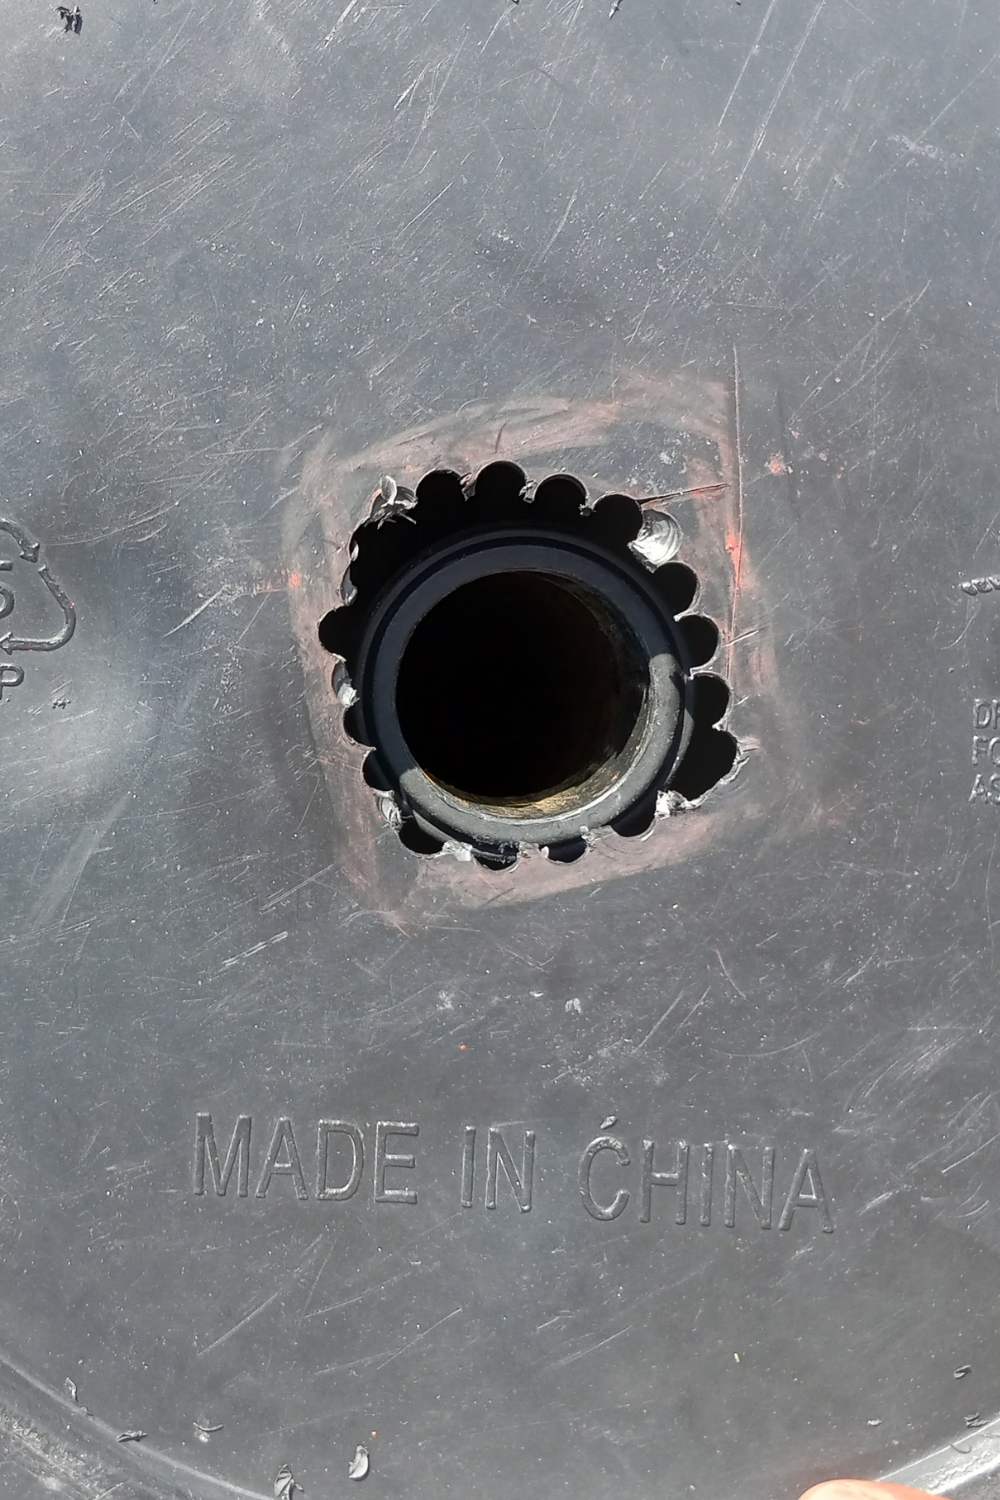
Step 3: Cut your hole.
Use a large drill bit to create a series of holes along your circle. Try to get them as close together as you can.
Use a box cutter or serrated knife to finish cutting out your pole opening. Then, repeat steps 2 – 4 to create a hole in the second barrel.
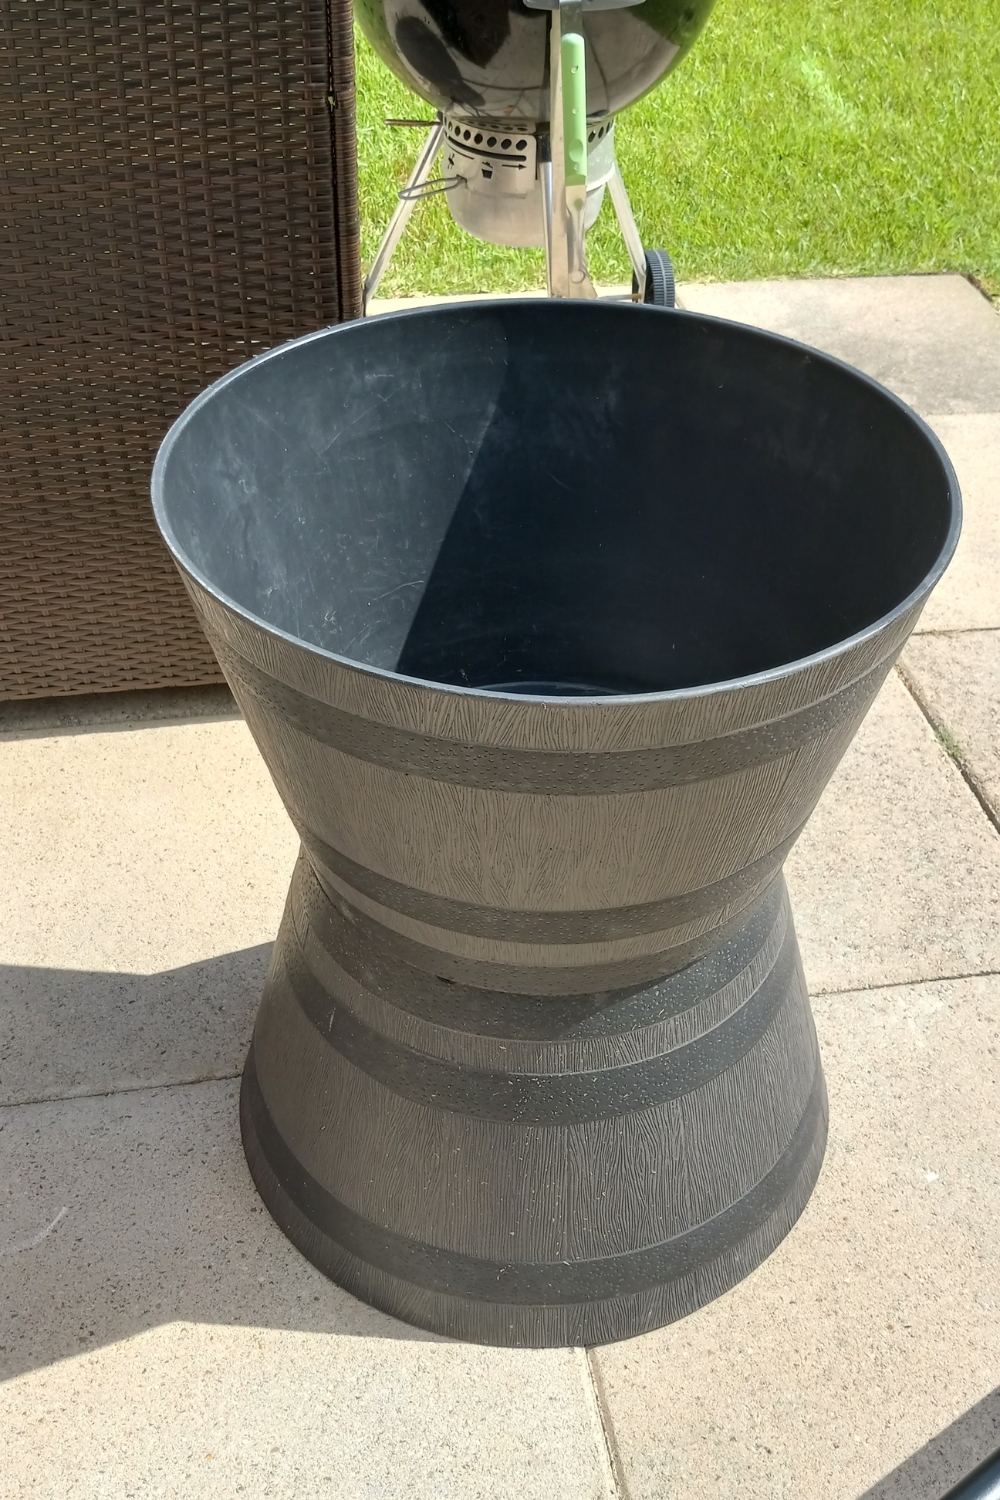
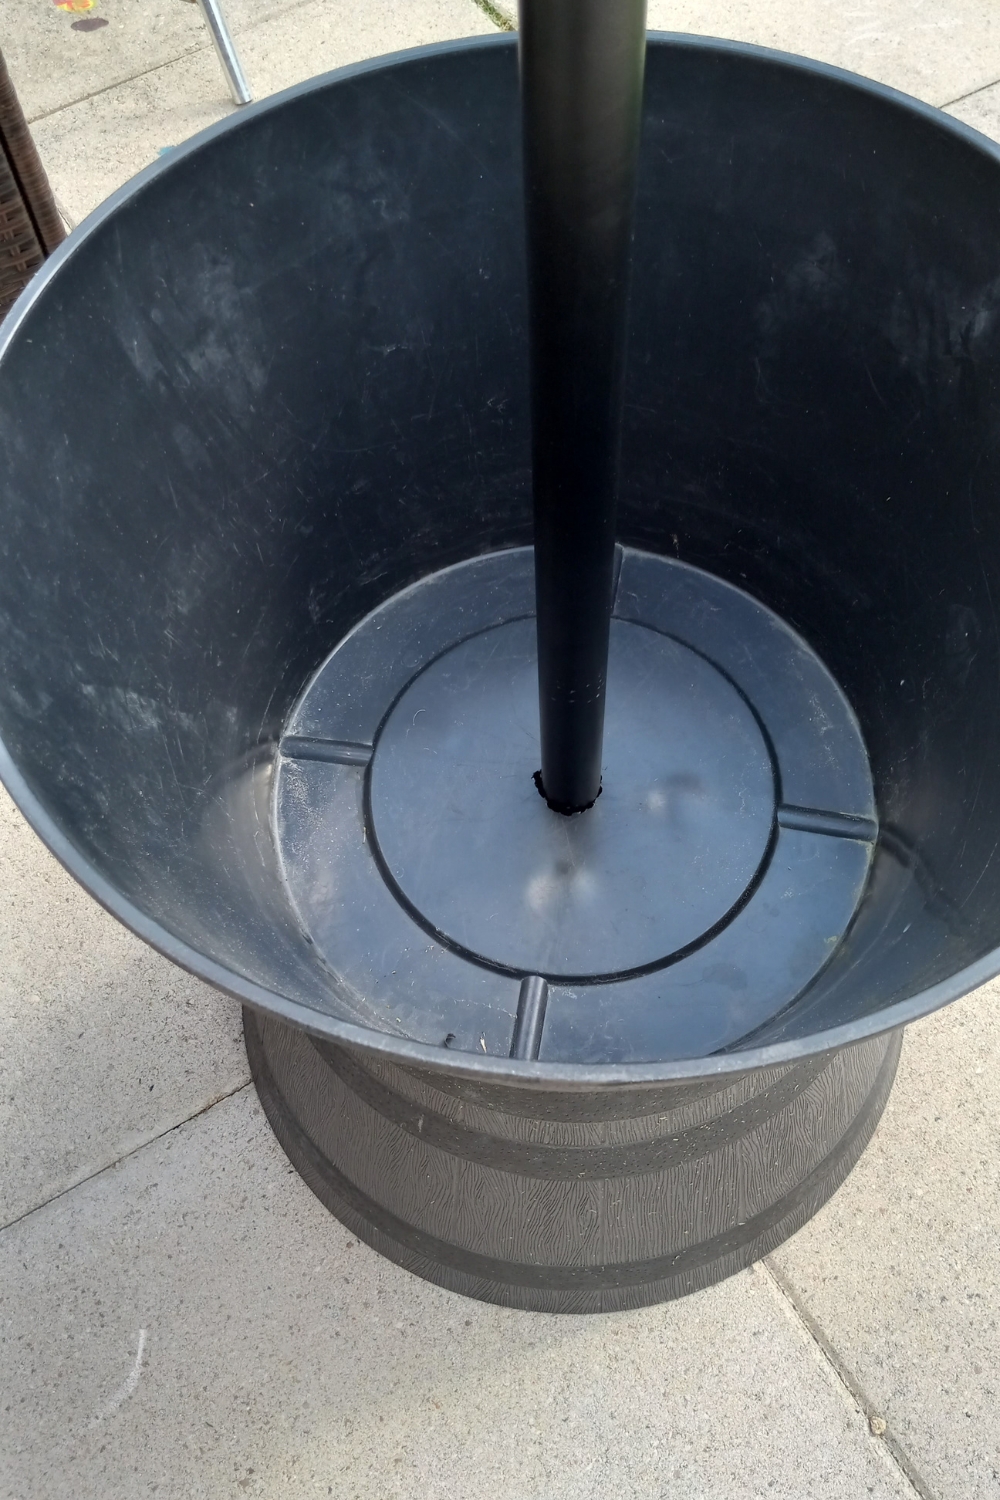
Step 4: Assemble.
Place the first barrel upside down on top of your umbrella base.
Then, place the second barrel right side up on top of the first.
Line up the holes and feed the umbrella through both barrels and into the umbrella base.
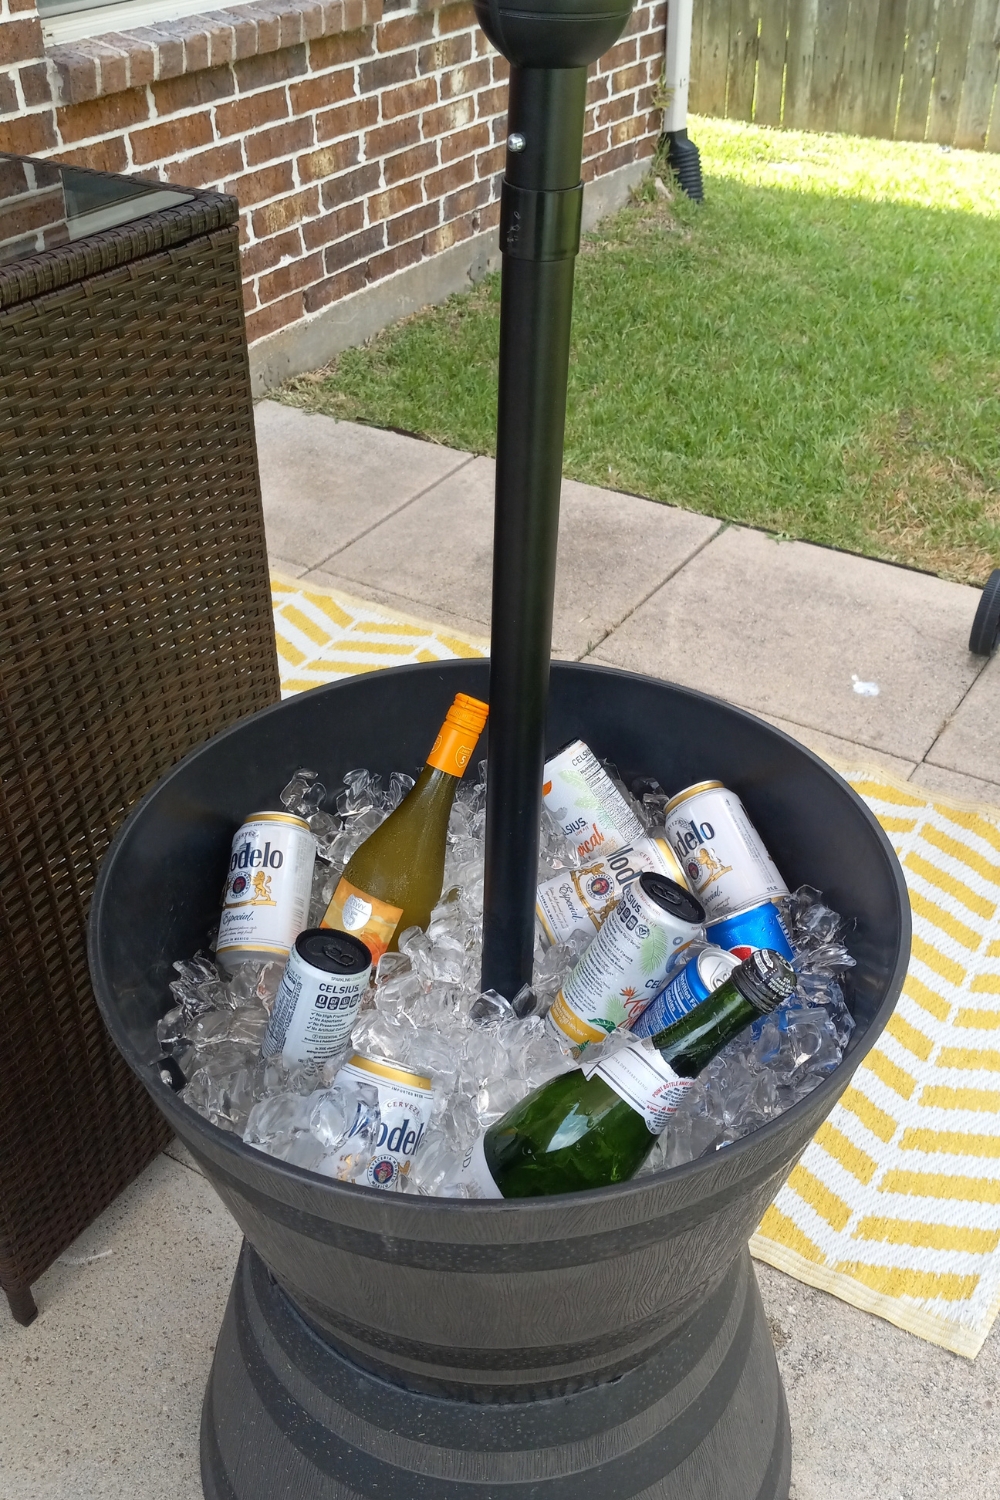
Step 5: Fill your tub with ice and your favorite beverages.
My 22-inch whiskey barrel planter took about 9 small bags of ice (7 lbs each) to fill it to the top. As the ice melts it drains through the hole in the bottom of the planter.
Final Thoughts
This DIY Umbrella Stand Cooler came out great. It solves the issue of people potentially tripping over the umbrella base which also adds functionality to the space.
Best of all it didn’t cost me any money to put it together and I can easily disassemble it whenever I need to move it around.
Here’s a final look at the new patio addition.

Conclusion
I hope you found this DIY Umbrella Stand Cooler tutorial helpful. If you did, please share it with a friend and follow Dianne Decor on Instagram, Pinterest, and YouTube for more from me.
Here are a few more posts you may like…
- DIY No Sew Replacement Patio Cushions
- Sunnydaze Planter Bench Review
- How To Decorate a Small Back Patio
Don’t forget to join the mailing list before you go. I’ll send you a copy of my weekly newsletter filled with my latest posts, decorating inspirations, and the latest deals on home decor.


