Pantry Makeover – 5 Tips for Success
FTC Disclosure - This post contains affiliate links and I will be compensated if you make a purchase after clicking on my links.
*Item received for free for promotional consideration or a sponsored link.
Completing a remodel or makeover of any portion of your home can seem overwhelming. We often put off the task until it creates a level of stress in our daily lives that we can no longer tolerate. This was certainly the case with my pantry makeover.
Truth be told, it was never really organized.
In my haste to get us unpacked when we moved to this house last summer; I merely put everything in the general area it needed to be and called it a day.
It wasn’t pretty, but it worked.
The problem with this approach is that over time without establishing a proper “home” for your things; chaos will quietly creep in and take over.
Sure all of our non-perishable goods and spices were in the pantry, but where? Each time I stepped inside my mind raced with questions.
Where is the pasta? Where is the olive oil? Do we still have this? Did I remember to buy that?
By December my somewhat together pantry looked like this…

I know right! It was a giant hodgepodge of pots, pans, food items, coolers, and paper products.
When guests would come over I’d do my usual 15 minute express clean and our home would look tidy.
More often than not, we gather in the kitchen. We cook together, serve food off of the island, drink wine, talk, etc. etc.
But, I always avoided opening the pantry door while we had company over if I could. It looked so bad. I was embarrassed.
Months and months passed and by January I was over it. I was tired of hearing myself say “I’m going to get this area organized” over and over again. So, I finally sprung into action with my pantry makeover.
Stress-Free Pantry Makeover
I didn’t have a solid plan in mind. I just knew that I didn’t want to be stressed out during the process.
So I decided to complete this task in a few steps as possible.
I devised an easy 3 step approach to the project.
First I would purge and clean. Next, I would stage and arrange my shelves with empty containers. Finally, I would add everything I was keeping back into the pantry.
This checklist approach makes the project virtually stress free once I started.
I knew what I was going to do, I prepared myself to see it get much worse before it got better, and I powered through.
When it was all said and done it took me a little over two hours to complete. Throughout this project, I learned a few things that I’ll share below.
5 Pantry Makeover Tips
TIP #1 – Get everything out without organizing.
Meticulously categorizing items to sit in a temporary home on your counter is unnecessary stress. Everything will find its proper home when it is returned to the pantry.
While you’re removing items, purge as you go. Be ruthless about this decluttering process.
Get rid of anything expired, anything that hasn’t been used in a year, and any incomplete food storage containers (i.e. bottoms without lids).

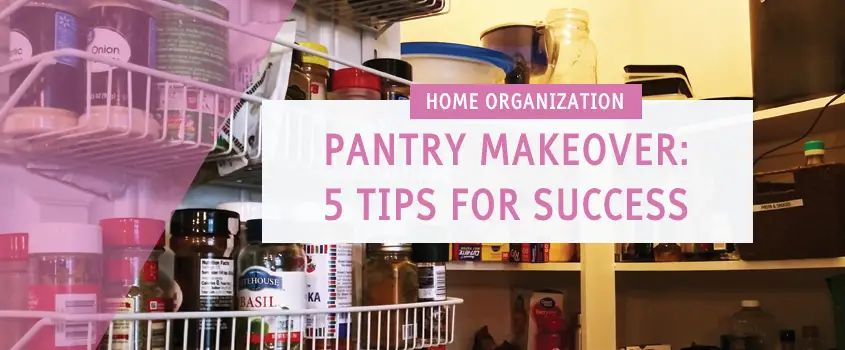
TIP #2 – Use baskets.
Containing as much as you can in baskets will help your pantry stay organized in the long run.
Designate a use for each basket such as baking items, oil & vinegar, or snacks.
Doing this will make it a breeze to retrieve exactly what you want, put things away quickly, and stop items from getting lost or knocked over. They’re also very easy to slide on and off of shelves.


TIP #3 – Don’t remove items from their packaging unnecessarily.
Try not to get carried away over fancy containers or repackaging every little thing.
Yes, it looks very pretty to have uniform canisters of flour, sugar, oats, and pasta. But, in doing this it will likely create more work in the long run.
You’ll likely find yourself constantly refilling containers just for aesthetics. Or, having to manually keep track of expiration dates. Or, having to reprint cooking instructions for things like pancake mix and grits.
Furthermore, if you like to experiment with different brands you may find it a pain to keep track of what brand of granola or cereal you put in the container in the first place.
For my project, I only transferred products to special containers if it would make them easier to access than before.
For instance, we buy huge 25 lb bags of rice. But, getting 2 cups of rice from a heavy bag each time is a pain. So, I transferred rice into multiple easy to access containers instead.

TIP #4 – Function should always prevail over form in the kitchen.
I knew my pantry project wouldn’t rival some of those incredible examples I’d seen on Pinterest.
But, before pretty labels and glass displays I had to think of my actual day to day experience in the kitchen.
With a 1-year-old who’s all-time favorite activity is to pull things off shelves (just because); I knew I couldn’t utilize my lower spice rack tiers (there was an incident with some pepper and a lot of tears).
I also knew I couldn’t keep glassware or anything breakable on the lower shelves of the pantry closet.
I couldn’t store zip lock bags and aluminum foil on the lower levels (I recently learned its impossible to re-spool a roll of aluminum foil to its original state after it been stretched out across the living room floor).
But I digress…. my advice is to make it functional for you. Don’t design your pantry for Instagram.
TIP #5 – Live with it before you label it.
Give your new arrangement time to work itself into your routines. If you find certain things work better in other containers or with a different group of products, rearrange things.
Live with the pantry for a week or two before you take the time to start adding pretty labels.
You’ll more than likely shift things. So, take your time.
This will help you avoid the stress of having to relabel baskets or containers later.
Conclusion
I hope you found this post helpful. If you did, please share it with a friend and follow me on Bloglovin’ for more content.
Don’t forget to comment below if you have any suggestions to share regarding pantry makeovers. I’d love to hear your ideas.